Showing posts with label Border Punch. Show all posts

Monday, October 19, 2009

The Cuttlebug Spot - Challenge 53 - Trick or Treat

With thoughts of Halloween in our minds, The Cuttlebug Spot's challenge this week is to make a treat bag or wrapper. I found this little cutie on Splitcoast Stampers. I wanted something that would lend more flare from the contents bright colors then the decoration itself, as the goodies really are what we're all after anyways, right!?!? Cuttlebug's die/emboss set bats and spider went perfect with my EK Success Bat border punch. Simple, fun, super cute!
Our winner this week will enjoy a $20 gift certificate to spend as you wish with Oh My Crafts. Be sure to stop by and see the other DT work, as well as show us what you're up to!
Have a great week~

Monday, August 31, 2009

The Cuttelbug Spot - Challenge 46

Who's ready for school to start??? The Cuttlebug Spot is celebrating education with our projects this week. My son is starting Kindergarten, and as of this week has been accepted to the best place we could ask for him to start his schooling... and his teacher... well she's one of my best friends so it just doesn't get much better! My card is super simple this week due to limited time. The Cutting Cafe has this great "Just A Little Something From Me To You For My Teacher Stamp. 99 cent special and well worth it. I used the Cuttlebug A2 Diamond Plate folder. EK Success border punch ABC123. DCVW paper, misc ribbon and felt shapes.

Play along with us this week and create anything that is school or education themed. We've got a $20 gift certificate sponsored by Custom Crops this week for one creative participant!

Friday, April 10, 2009

OCC Easter Card Challenge

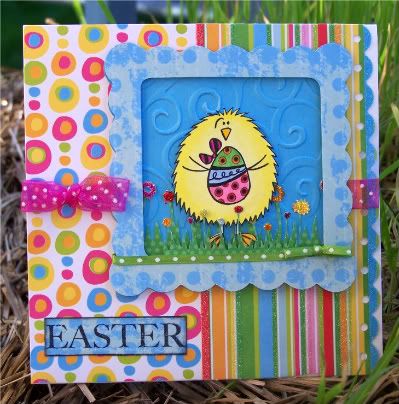
Easter is in full bloom on many of our blog's this week. Our Creative Corner is no exception! I stumbled upon this great blog and thought I'd give the challenge a go. I have created a super fun bright and cheery Easter card using a Penny Black stamped image I received in a swap. It is super cute, I just feel happy looking at it! The design on the egg prompted the spots and dots theme. Paper is DCVW Spring glitter stack. This pad is full of fun, vibrant color and textures. I used my cuttlebug for the sky, cricut to cut the scallop frame and grass the little chick is standing in. I think he is hoping to find more treasures as great as what he is holding! Thanks for looking!

Paper: DCVW Spring glitter stack
Stamp: Penny Black, Autumn Leaves-Spring Swirl for Easter (with the swirl cut off)
Cuttlebug A2: D'Vine Swirl
Cricut: Accent Essentials- 3 1/4 scallop frame, Plantin Schoolbook 3/4 and 1 1/4 Tall Ball Grass
Fiskars: Treading Water border punch
Stickles on flowers: Orange Peel, Waterfall, Xmas Red, Yellow and Magenta
Misc: Ribbon

Monday, April 6, 2009

The Cuttlebug Spot ~ Challenge 25

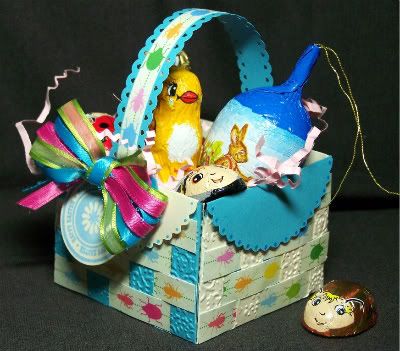
Easter bags or baskets are filling The Cuttlebug Spot this week! Easter fun is such a sweet way to jump into Spring. The weather is getting nice, flowers are blooming, sweet smells fill the air, color is popping around you and there is TONS of candy in the stores!!! LOL My son is thrilled for Easter this year. Our challenge gave me the oppertunity to create a special little basket for him. We found these adorable Lyndt Bug & Bees chocolates a while ago. I didn't know what I'd do with them to make them a little more special then others until today! The beetle paper is from the Spring DCVW stack cut into strips, woven into envelopes cut from Cricut's Wild Cards. I was searching for a little basket 'help' today and came across a SU tutorial at Beauty Lies Within for this great woven basket using the Big Shot Envelope plate. I don't have Big Shot nor the plate so I had to put my thinking cap on and improvise! The envelope (Carraige) on page 76 worked perfect!


How to make the basket~
-Cut 8 envelopes at 3 inches for a square basket. You can add 2 more to mimic the SU basket with 6 sides.
-Using 4 envelopes to make basket: Cut top of envelope scalloped edge flap off.
-Score sides and fold in.
-Cut from top and bottom folds at: 1/2″, 7/8″, 1-3/8″, 1-7/8″, 2-3/8″, and 2-3/4″.
-This will give you 7 'sections' separated by your cut lines. Cut out section 2, 4 and 6. You will have 4 left (2 at either end and 2 in the center).
-Cut your designer paper in 1/2" by 3" strips. I used 4 strips per side.
-Weave between envelope sections, using adhesive to keep in place. I used photo squares. They were easy to apply and nearly the same size as each strip. Some strips will a little smaller because of my paper choice so I just folded or cut them as needed.
-Add adhesive to each side flap and stick them together to form your box shape. Add adhesive to bottom and fold up. The box frame is done.


To add the scallop edges and cover the top of your box edge:
-Score remaining 4 envelopes so the top flap will fold over.
-Cut the envelopes flap edges off.
-Fold envelope scallop flap over and measure from fold line 2 3/4", cut.
-Add adhesive to each. Adhere inside of the basket, covering weave, fold flap over and stick on outside weave.


This made the basket a lot more sturdy inside and out as well as adding the cut scallop edge.
I placed the finished handle with adhesive and a brad on both sides.

Whew! I sure love the way it turned out and it feels really strong. Liam will love it!


Cuttlebug A2~ Textile
Cricut~ Wild Cards: Carraige 3"
Paper~ DCVW Spring stack
Border Punch~ Martha Stewart
Stamp~ Studio G: Spring block stamps from Michael's
Misc~ Ribbons, Around The Block Paper Tagger to hold circular tag onto basket

Monday, November 24, 2008

Just Christmas and Birthday Cards ~ Sketch 7 & 8

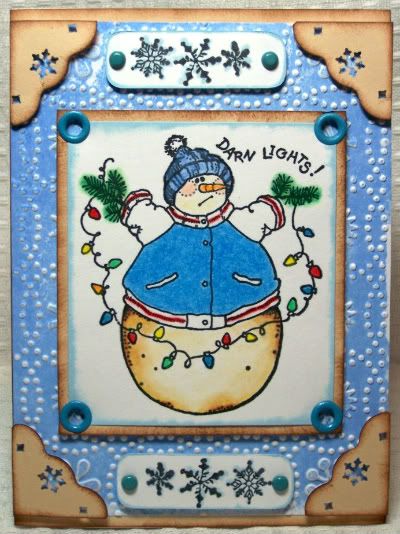
Challenge 8, created by Janina, used elements I'd never combined before. At first I thought how could I use 4 brads and 4 eyelets on one card? And how could I make photo corners work with everything and a textured base? I love being stretched creatively in this way and am very pleased with my result. This stamp is adorable. It is silly and so true! This is a perfect card for a man this time of year... Darn Lights!

Be sure to stop by JCBC and post your take on this challenge. We've got some fun prize giveaways this month so be sure to check in on us often! Have a wonderful holiday~

Cuttlebug folder used: A2: Snowdots (inked with Sky Blue pigment ink)
Border punch: EK Success snowflake, then cut to fit corners
Stamps: Uptown Rubber Stamps (Darn Lights), Inkadinkadoo snowflakes
Inks: Colorbox pigment inks: Chestnut Roan and Sky Blue and Chalk: Ice Blue
Misc: Brads, Eyelets


Challenge 7, created by Mada, was a really fun sketch. I love the simplicity of the sketch. You can dress it up or keep it simple and it will still look great! Here is my take for a Birthday card using my favorite Mary Engelbreit papers and a sticker. I feel like this is totally cheating but it worked too perfectly!

All papers are generic cardstock or Mary Engelbreit
Cuttlebug A2 folder: Bloom Dots
Other: Mary Engelbreit stickers

Monday, November 10, 2008

Happy Thanksgiving - The Cuttlebug Spot #7

I am so happy to join the design team over at The Cuttlebug Spot! I have been excited about there challenges since they started. This weeks is Challenge 7: Emboss the Cut! You can use any diecut from cricut, cuttlebug or other... just be sure to add depth and texture by embossing your cut! I had a lot of fun thinking of our beautiful fall season we're having. This is my favorite time of year. I love the colors. I love the crisp air. I love the feeling of togetherness it brings to my family with only one wish that the days lasted longer! My card is the result. Be sure to stop by and check out other DT cards! Leave us a note with your creations too for a chance to win a fun prize!

Paper used is all DCVW Fall and Glitter Fall stacks.
Turkey cut from Cricut~ Stretch Your Imagination.
Cut embossed with Cuttlebug~ Tiny Bubbles.
Turkey has color added with prisma color pencils.
Border punch: Fiskers~ Treading Water
Ink: Color Box~ Chestnut Roan
Misc buttons and Pen-Touch pen~ white for the eye.

Monday, November 3, 2008

Sketch #5 ~ Just Christmas and Birthday Cards

Sketch #5 over at Just Christmas and Birthday Cards was designed by DT member Tanja. This week it was my turn for birthday greetings. Stop by and check out all of the other design team creations! I love how we all use the same sketch but all finished products stand alone.


Wednesday, October 29, 2008

Halloween / Fall Swap Creations

I have just completed the biggest challenge swap I've taken part in thus far in my time as a crafter over on the Cricut MB. It was a lot of fun, really stretched me creatively, drove me bonkers at times, but ultimately I am pleased with what I created. Here are the goodies I made for my swap partner, with details about the challenge and such. All are Halloween or Fall related crafts.

Challenge 1 ~ We were to create 3 recipe cards of foods we enjoy. These were a huge stretch for me but I finally settled on recipes and the rest just flowed to the paper. I found clip art that worked with my recipes to create each backround paper.
Challenge 2 ~ 6 Halloween or Fall decorated gift bags. This was by far my favorite part of the swap. Challenge 3 ~ We had the choice to create an album or 6 cards. I chose the cards (all previously shown on my blog) and sent them in this Card Box. I love these things. A fun way to keep the cards together and finish off a gift.
Challenge 4 ~ Create 10 embellishments using any technique you wanted.

Challenge 5 ~ We had the choice to make four items from the following list: Mats, tags, journal blocks, titles, inchies or word tags. Here's what I came up with...
And finally, an altered item. This is a wood purse I purchased from Michaels, covered in paper and such. Fun fall decoration.
Thanks for looking~