Showing posts with label Cricut. Show all posts
Thursday, September 30, 2010
For The Love of My Boy...
Monday, May 31, 2010
The Cuttlebug Spot Graduation Card
Paper is DCVW, 2010 is cut from Cricut Graphically Speaking, embossing folder is Cuttlebug A2 Stars. The cute little House Mouse image is a keeper... I received it in an image swap ages ago. I love it :)
Friday, April 16, 2010
Just Magnolia Sketch, Roses On Paper #35, Stamp Something Layers, Cupcake Craft Challenges #85
Just Magnolia has a great sketch (as well as a Blog Hop so be sure to check it out!!) I used their sketch for card 3 above turned to the left.

Roses On Paper Challenge #35 and Stamp Something are both asking for Layers on your projects. Some of my cards have more then others but put them all together and whew!!!
Cupcake Craft Challenge #85 is to Make Your Own Flowers. I made some paper punch flowers using waxed paper and coffee filters, 1 and 1.5 inch circle punches. These are fun and simple. Punch 6 of each circle, ink them up, layer and place brad to secure, crumple each layer from inside out until your pleased.
All of the papers are K&Co Amy Butler, cricut Storybook cartridge used for branches, iTop used for large brads on card 3.
Thanks for stopping by! Enjoy the weekend.
Tuesday, March 2, 2010
Joy Fold Card
Stamp: Hangler, Basic Grey & Heidi Grace
Cricut: Home Decor, Storybook
Paper & Die Cut: K&Co
Think Green - The Cuttlebug Spot
Stamps: Magnolia and Studio G
Cricut: Storybook
Cuttlebug: A2 Border
Paper: DCVW Butterflies & Spring '09 stacks
Misc: ribbon, brads, prima flowers
Cricut: Storybook
Cuttlebug: A2 Border
Paper: DCVW Butterflies & Spring '09 stacks
Misc: ribbon, brads, prima flowers
Monday, February 15, 2010
The Cuttlebug Spot - Altered Frame
Goodies Used~
Cuttlebut: A2 Floral Fantasy and A2 Border With Love
Cricut: A Childs Year
K&Co Paper: Brenda Walton Sweet Talk
Color Box Inks: Pink, Warm Red & Rose Coral
Martha Stewart Border Punch
Cuttlebut: A2 Floral Fantasy and A2 Border With Love
Cricut: A Childs Year
K&Co Paper: Brenda Walton Sweet Talk
Color Box Inks: Pink, Warm Red & Rose Coral
Martha Stewart Border Punch
Sunday, February 14, 2010
Cupcake Craft Challenge 77 & Polycraft Monday Challenge 33
Polycraft Monday Challenge #33 is asking for Things With Wings... at first I thought I had nothing to choose from for this challenge and almost needed to buy a digi stamp or two just to play along. This may have been because I looked at the cuties being used by the DT, but this Mo Manning digi stamp (Plump Fairy) suited me quite nicely, especially in the red! She is quite lovely and looks to me like she indeed feels wonderful in her pose. You have to feel wonderful when wearing a red dress! LOL
Goodies used:
Mo Manning Digi Stamp
Bo Bunny Paper
Some fabby embossed paper from Germany and a brad made
with my I-Top Brad tool sent by my lovely friend Kathrin
Stickles: Xmas Red, Cinnamon, Diamond
Prisma Flowers
Cricut: Home Decor
Color Box Ink: Chestnut Roan
Distress Ink: Antique Linen
Lace from my Grammy
Mo Manning Digi Stamp
Bo Bunny Paper
Some fabby embossed paper from Germany and a brad made
with my I-Top Brad tool sent by my lovely friend Kathrin
Stickles: Xmas Red, Cinnamon, Diamond
Prisma Flowers
Cricut: Home Decor
Color Box Ink: Chestnut Roan
Distress Ink: Antique Linen
Lace from my Grammy
Monday, February 1, 2010
Cuttlebug Spot - 3M post it note paper challenge
Thursday, January 28, 2010
Cupcake Craft Challenge – #75 Matching Set
Images are distressed with Antique Linen color. Fun Flock: Chili Pepper Red. Papers are K&Co.
Labels:
Cards,
Cricut,
Cupcake Craft Challenge,
Tales From Polycraft
Monday, June 1, 2009
The Cuttlebug Spot ~ Challenge 35
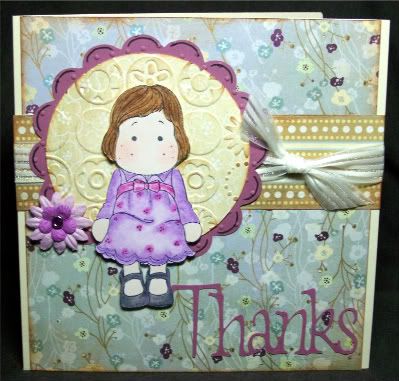
Get out your stamps and color with us this week at The Cuttlebug Spot! We have some new DT members to welcome and so many adorable cards this week you'll surely want to stop by! This week I had fun with this adorable Tilda. I am still getting 'used' to her sitting... and trying to make her not look like she is floating in the air... practice practice :) Cute all the same. Cuttlebug: Swiss Dots and Spots and Dots
Cricut: Plantin Schoolbook, Mini Mono's and Lyrical Letters
Paper: Basic Grey
Stamp: Magnolia
Labels:
Cricut,
Cuttlebug,
Magnolia,
Thank You Cards,
The Cuttlebug Spot
Monday, May 25, 2009
U R Special... CB Spot Challenge 32
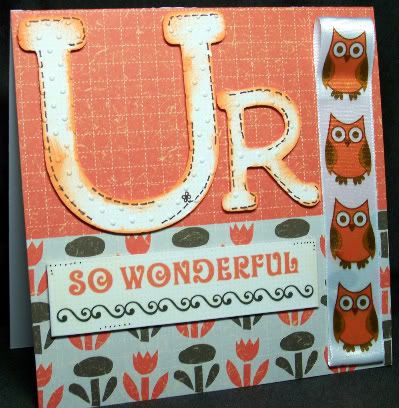
Happy Memorial Day~ This week at The Cuttlebug Spot our theme is to craft using Brown with either Blue or Orange. I found this adorable Owl ribbon in the perfect colors and knew it was a must have. Printed ribbon is a little tricky for me. You can't really tie a bow, twist, etc. I wanted to only see whole Owls also so the turn under not only made it work but added a fun texture to the card.I used the Spots and Dots folder to emboss the "UR" letters, cut from cricuts Lyrical Letters. All papers and Vellum phrase is Colorbok~ Friendly Forest.
Monday, May 11, 2009
The Cuttlebug Spot ~ Challenge 30
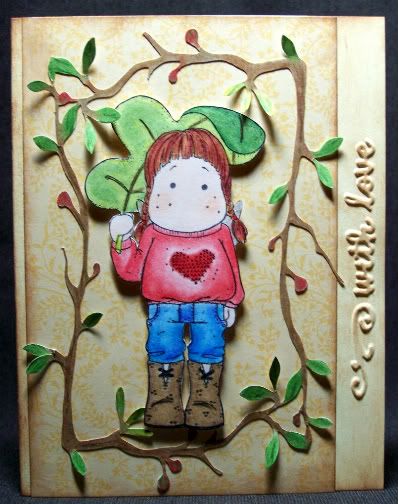
Look Through Our Window is the theme this week at The Cuttlebug Spot.... create any card or project using a frame or window. My little Tilda is framed with branches showing signs of spring, taking shelter from the showers that brings it all to life. I really wanted her to be the focus of the card, yet be alive within it. This time of year I want to be out in the storm, clearing way for the new growth be it rain or shine. So rather then look into the window to see it all happening, to me this card is looking out the window being a part of the work to be done. I am really inspired with the beautiful work all of The Cuttlebug Spot DT created this week. Surely you will be too so be sure to stop by and take a look around!
Just Christmas and Birthday Cards ~ Sketch 31
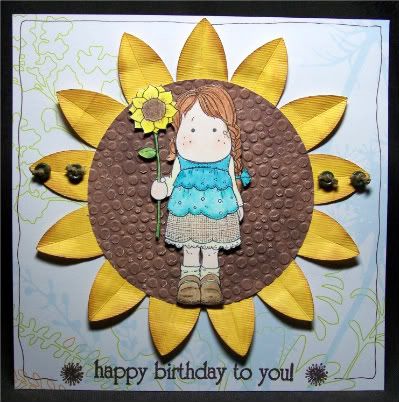
Happy Monday~ This week at JCBC I stretched the sketch just a bit to use this great sunflower cut with my Tilda. I adore this little lady and cannot wait for the real flowers to be in bloom! I needed some cheer in my head and craftroom... sunflowers is all I could think of! My sketch this week is a simple one but the ladies have really put it to work so be sure to stop by and see the other DT cards. Fabulous as always!
Wednesday, April 29, 2009
Greeting Card Holder

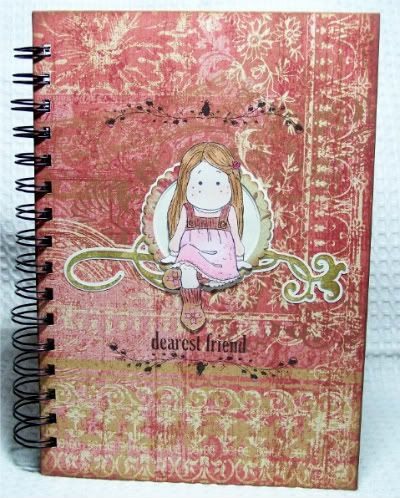
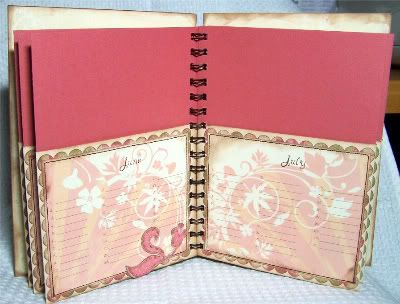
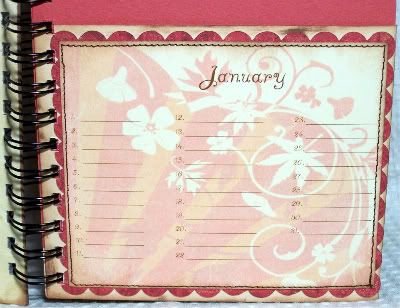
This little book was created a while back but never posted... I really am so proud of how it turned out from the idea phase to completion... I have a store bought one and knew I could make something similar with a special handmade touch for a special friend. I used my cricut for the scalloped backround for each month, Tilda's frame on the cover and the little flower to cover a boo-boo on June :). I should have added more of these throughout the book as it looks really lovely. The calendar months were made using MS Word. I forget what I searched for now but found the clip art, altered the color a bit and added the month and days with lines over the top. Each page is the same just with the month name change, and each opposite page has the image backround flipped so they sort of match. The front and back cover are chipboard covered in matching paper to give it a bit more strength, then all binded with my BIA... this tool is fabulous. This project was my first BIA use. I just love it. I kept the decor pretty simple as I tried to think about longevity and several uses versus frills. This one puts my store bought one to shame... need to make another one now! LOLMonday, April 13, 2009
The Cuttlebug Spot ~ Challenge 26
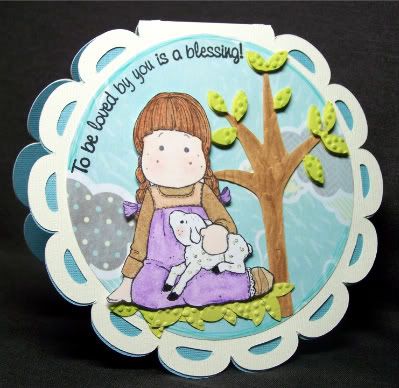
Get ready to play with new shapes is our theme this week at The Cuttlebug Spot! Make a card in any shape but square or rectangle. I am really impressed with everyones projects this week. If you don't feel up to the challenge you should definately stop by and see the other ladies incredible cards! My little card is a simple one but it took me forever to dream up and actully create! This cute little Tilda from the Easter collection needed to be used in some way. I cut the card base from Cricut's Wild Cards as well as the tree. The leaves are embossed with the Cuttlebug Snow Dots folder (I cut the leaves off the tree so I could place them only where the dots were), and the tree trunk with Bird Call although my photo doesn't really show this. I love the backround paper and of course after adhering it realized it looked like my Tilda was floating in the sky :). She still sort of does even with a bed of leaves tucked under her... perhaps I should add more!
Friday, April 10, 2009
OCC Easter Card Challenge
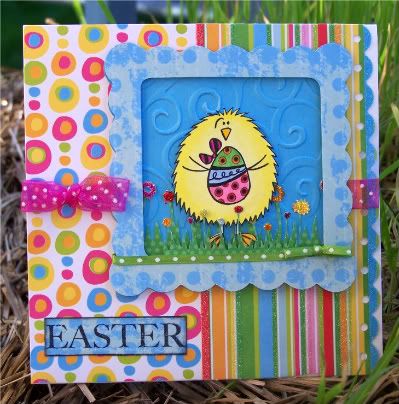
Easter is in full bloom on many of our blog's this week. Our Creative Corner is no exception! I stumbled upon this great blog and thought I'd give the challenge a go. I have created a super fun bright and cheery Easter card using a Penny Black stamped image I received in a swap. It is super cute, I just feel happy looking at it! The design on the egg prompted the spots and dots theme. Paper is DCVW Spring glitter stack. This pad is full of fun, vibrant color and textures. I used my cuttlebug for the sky, cricut to cut the scallop frame and grass the little chick is standing in. I think he is hoping to find more treasures as great as what he is holding! Thanks for looking!Paper: DCVW Spring glitter stack
Stamp: Penny Black, Autumn Leaves-Spring Swirl for Easter (with the swirl cut off)
Cuttlebug A2: D'Vine Swirl
Cricut: Accent Essentials- 3 1/4 scallop frame, Plantin Schoolbook 3/4 and 1 1/4 Tall Ball Grass
Fiskars: Treading Water border punch
Stickles on flowers: Orange Peel, Waterfall, Xmas Red, Yellow and Magenta
Misc: Ribbon
Monday, April 6, 2009
The Cuttlebug Spot ~ Challenge 25
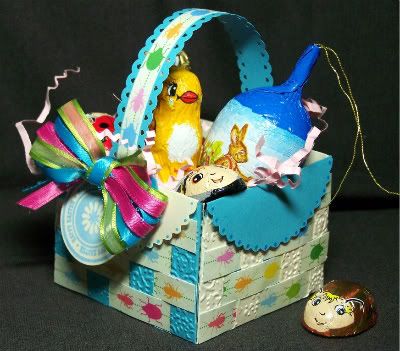
Easter bags or baskets are filling The Cuttlebug Spot this week! Easter fun is such a sweet way to jump into Spring. The weather is getting nice, flowers are blooming, sweet smells fill the air, color is popping around you and there is TONS of candy in the stores!!! LOL My son is thrilled for Easter this year. Our challenge gave me the oppertunity to create a special little basket for him. We found these adorable Lyndt Bug & Bees chocolates a while ago. I didn't know what I'd do with them to make them a little more special then others until today! The beetle paper is from the Spring DCVW stack cut into strips, woven into envelopes cut from Cricut's Wild Cards. I was searching for a little basket 'help' today and came across a SU tutorial at Beauty Lies Within for this great woven basket using the Big Shot Envelope plate. I don't have Big Shot nor the plate so I had to put my thinking cap on and improvise! The envelope (Carraige) on page 76 worked perfect!How to make the basket~
-Cut 8 envelopes at 3 inches for a square basket. You can add 2 more to mimic the SU basket with 6 sides.
-Using 4 envelopes to make basket: Cut top of envelope scalloped edge flap off.
-Score sides and fold in.
-Cut from top and bottom folds at: 1/2″, 7/8″, 1-3/8″, 1-7/8″, 2-3/8″, and 2-3/4″.
-This will give you 7 'sections' separated by your cut lines. Cut out section 2, 4 and 6. You will have 4 left (2 at either end and 2 in the center).
-Cut your designer paper in 1/2" by 3" strips. I used 4 strips per side.
-Weave between envelope sections, using adhesive to keep in place. I used photo squares. They were easy to apply and nearly the same size as each strip. Some strips will a little smaller because of my paper choice so I just folded or cut them as needed.
-Add adhesive to each side flap and stick them together to form your box shape. Add adhesive to bottom and fold up. The box frame is done.
To add the scallop edges and cover the top of your box edge:
-Score remaining 4 envelopes so the top flap will fold over.
-Cut the envelopes flap edges off.
-Fold envelope scallop flap over and measure from fold line 2 3/4", cut.
-Add adhesive to each. Adhere inside of the basket, covering weave, fold flap over and stick on outside weave.
This made the basket a lot more sturdy inside and out as well as adding the cut scallop edge.
I placed the finished handle with adhesive and a brad on both sides.
Whew! I sure love the way it turned out and it feels really strong. Liam will love it!
Cuttlebug A2~ Textile
Cricut~ Wild Cards: Carraige 3"
Paper~ DCVW Spring stack
Border Punch~ Martha Stewart
Stamp~ Studio G: Spring block stamps from Michael's
Misc~ Ribbons, Around The Block Paper Tagger to hold circular tag onto basket
Labels:
Border Punch,
Cricut,
Cuttlebug,
Easter,
The Cuttlebug Spot
Monday, March 23, 2009
Just Christmas and Birthday Cards ~ Sketch 24

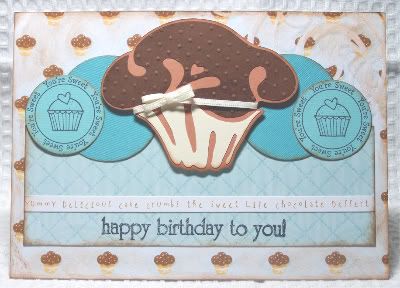
Happy Monday everyone! I missed last weeks fun due to illness in our house. We're all feeling better now and I am so excited to play again! Tanja created our fun sketch this week at JCBC. Simple elements made for simple fun for me this week! I love this cupcake cut made from Cricut - Home Decor. It's fun and playful just the way a birthday card should be. Take time to view the other DT creations and create your own card this week! There is the cutest Magnolia posted for prize. As always, thanks for stopping by!
Paper~ DCVW Sweet stack
Cricut~Home Decor for cupcake, cut at 2 3/4 inch
Cuttlebug A4~ Swiss Dots
Stamps: Studio G and Heidi Grace
Misc: Ribbon and ink
Monday, March 9, 2009
The Cuttlebug Spot ~ Challenge 21

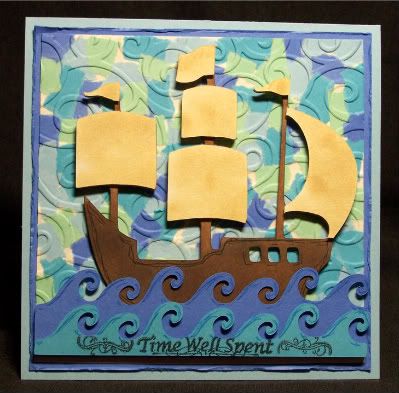
We have a fun challenge at The Cuttlebug Spot this week... Serendipity technique embossed used somehow on your card. I had a lot of fun with this card. My son and I made a ABC fishing game using Cricut's An Ocean of Words over the weekend which is what prompted this card. He of course loves the pirate ship. He helped me by tearing the bits of paper for the backround while I made the cuts and doodled. I think we did pretty good! LOL I am really impressed with the other design team cards this week. So many different looks and ideas for this technique I definately will be trying out myself in the future. Stop by and show us your work~
Materials used:
Cuttlebug A2: D'Vine Swirl
Cricut: An Ocean of Words~ Pirate ship cut at 3 3/4, Waves 1 1/4, Seagrass 3 3/4.
Stamp: Studio G
Ship sails inked with Antique Linen Distress Ink. Ship inked with black and brown pigment ink.
Labels:
Cricut,
Cuttlebug,
Serendipity,
The Cuttlebug Spot
Monday, February 23, 2009
Just Christmas and Birthday Cards ~ Sketch 20
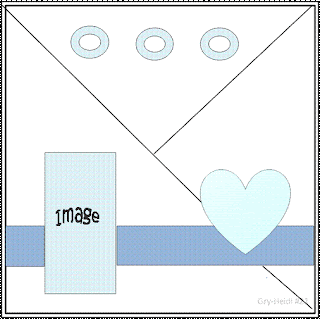
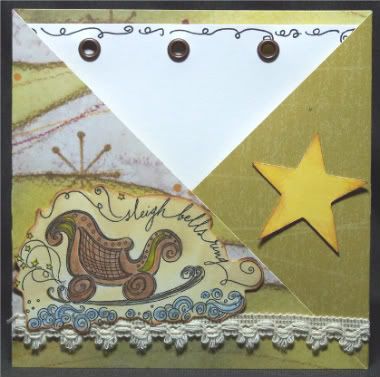
I have been a long time fan of The Criss Cross Card. Our sketch this week at JCBC suits this design perfectly. Gry-Heidi added some fun elements that all of the design team members took on differently. They are fun, simple and addicting. If you haven't tried them, give it a go and let us see your work!


Then cut the outer sides diagonally to make the 'criss cross' fold.
Pattern paper: Magenta~ White & Olive Green Waves
Stamp: Close To My Heart~ Magical Season
Cricut: Plantin Schoolbook Star cut at 1 1/2"
Misc: Ribbon, eyelets, prisma pencils
Subscribe to:
Posts (Atom)